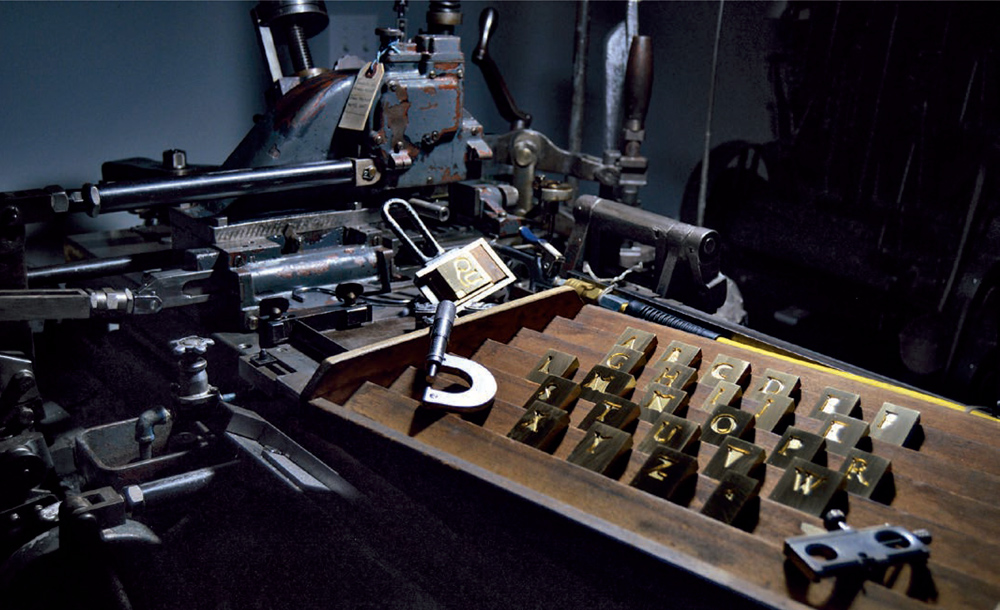
The Monotype Super Caster and foundry style matrices for 48-point Orfei, showing also the matrix holder (with QU ligature), a point-micrometer, and, far right, an ATF depth gauge.
My friend Lisa has said for years that I have a horseshoe up my ass. I usually balk pretty seriously at this suggestion, given the same long list of trials and tribulations we all have to navigate, but what she means is that I’ve been lucky over the years with opportunities. Or at least what might appear on the surface as opportunities. Robert Bringhurst, for instance, has had a big impact on my typographic life, and while it could be said that this is because, with him living fairly close by (a few hundred kilometers and a couple of ferries away), I had the opportunity to spend time with him early in my typographic career at his home on Quadra Island, the reality is that many years ago I simply cold called him and basically invited myself over for the weekend. And then asked if he could pick me up at the ferry. As my friends would attest, my social skills are a bit lacking. But, for whatever reason, he agreed, and the couple of days I spent with him twenty years ago nudged into focus a path that might have taken years longer to reveal itself.
There’s a fairly complex set of trails along that path that loop and twist and cross over one another. Trails that have, over the years, led me to meet and learn from and become friends with a wide range of printers and typographers: from Jan & Crispin Elsted and Andrew Steeves to Mark Askam and Jamie Murphy; from Greg Walters and Rich Hopkins to Rollin Milroy and, of course, Jim Rimmer, just to name a few. All of these people seemed to appear out of nowhere, but the truth is, I found my way to each by getting to know the others, and nearly all of them were confronted by the same impertinence on my part. And each responded, amazingly, with the same generosity.
While not known to many outside of Canada, Jim Rimmer was a major player in the typographic world up here. A prolific illustrator and type designer, not to mention a printer and typecaster, Jim was the last person in Canada still designing, cutting, and casting new metal types up until his death in 2010. If you don’t know of Jim and his work, you should, so go track down Rich Kegler’s documentary Making Faces. (1)
I’d known Jim for a while before he fell ill, and in the last couple of years leading up to his death I’d begun visiting him in New Westminster to learn more about casting type. It wasn’t much, a visit or two each year, but it led me to start looking for a casting machine myself. I’ve written about what happened next elsewhere (see the Greenboathouse Press website), but, long story short, after his death most of Jim’s gear landed with me in Vernon. The process of packing it up and hauling it home was an intense one, not only because it comprised around 20,000 pounds of equipment, but because it also came with a hefty legacy. If I was taking it with me, I had to do some serious work with it, work worthy of the legacy Jim had created with that gear.
Unfortunately, most of it sat in storage for a few years while I sorted out the logistics, and while I managed, in the first year after setting it up, to strip, rebuild, and learn to operate his Monotype Super Caster, the matrix engraving equipment remained a mystery to me. I spent the next decade attending ATF (American Typecasting Fellowship) conferences where I met a crew of young and old practitioners who live and breathe Monotype. From them (both in person and, more often, via email) I pieced together a working knowledge of type founding. A key player in that development was Micah Currier, who valiantly attempted to carry on another legacy, that of Theo Rehak and what remained of the American Typefounding Company (also ATF). Micah’s main challenge was to carry forward the traditions and protocols of matrix engraving as taught to him by Theo. Unfortunately, financial pressures and family obligations made Micah’s efforts to continue ATF (renamed The Dale Guild) impossible, but I owe him a huge debt for sharing with me not only his knowledge and skill, but also for helping me to fill in a few of the gaps I had in terms of equipment for making matrices. While I often feel Jim’s ghost standing behind me as I operate these machines, I think also of Micah every time I turn on the fitting machine or inspect a cutting tool through the ATF microscope.
Engraving matrices involves numerous separate processes, and each one poses a variety of mechanical and temperamental challenges; on top of this, each of these steps requires a ridiculous level of precision, and that precision very much depends on both the machines and the temperament of the operator. What I admire so much about Micah, Theo, Jim, and others is their herculean focus and patience, and this was the first challenge that awaited me when I set out to stumble in their footsteps.
The basic process of engraving a matrix is to produce a pattern at a large scale (say, four inches tall), which one arm of the pantograph traces, transferring the image, at a reduced scale, to the cutting arm, which, in turn, engraves the image into a block of brass. The reduction of pattern to engraving can be adjusted in order to produce a range of type sizes from a single pattern. For example, for a 60-pt glyph to be engraved at a reduction of 6.5:1 (the reduction I had settled on), the pattern would need to be made at 390 pts. The image is then engraved multiple times, cutting deeper into the brass each time, until the final cut produces the face of the image (glyph) to be cast. The depth of this cut must be exact in order to produce a piece of type that will be precisely .918 inches tall.
The first major challenge for me came in the form of the one mechanical process missing from my stock of equipment. The engraving process requires a variety of cutting tools in the pantograph. These tools are simply one-eighth-inch high-speed steel rods, ground to a four-sided point. Using Jim’s New Hermes grinding machine, producing tools to a zero-point is easy enough (although one must be cautious not to overheat the tip during this process). The problem was “finishing” the cutting tool. This involves honing the very tip of the cutter to a variety of widths, ranging from .002 to .025 in. These widths are dictated both by the ratio of the pantographic reduction, and by the precision of the cut. For instance, if, as in the example above, the ratio is 6.5:1, then the pattern end of the pantograph (the follower) must be exactly 6.5 times larger than the tip of the cutting tool (otherwise, the image will be engraved thinner or thicker than the pattern). The early cuts into a matrix blank are done with a fairly large cutting tip, say .025 in., which means one would use a .16 in. follower. The final cut of a matrix is the most important, not only to finish the outline of the image, but to engrave the floor of the mat, the “face” of the character. This must be cut to a smooth surface in order to get a good, clean face on the type. This final cut is done with a .003 in. cutter (close to half the thickness of a human hair).
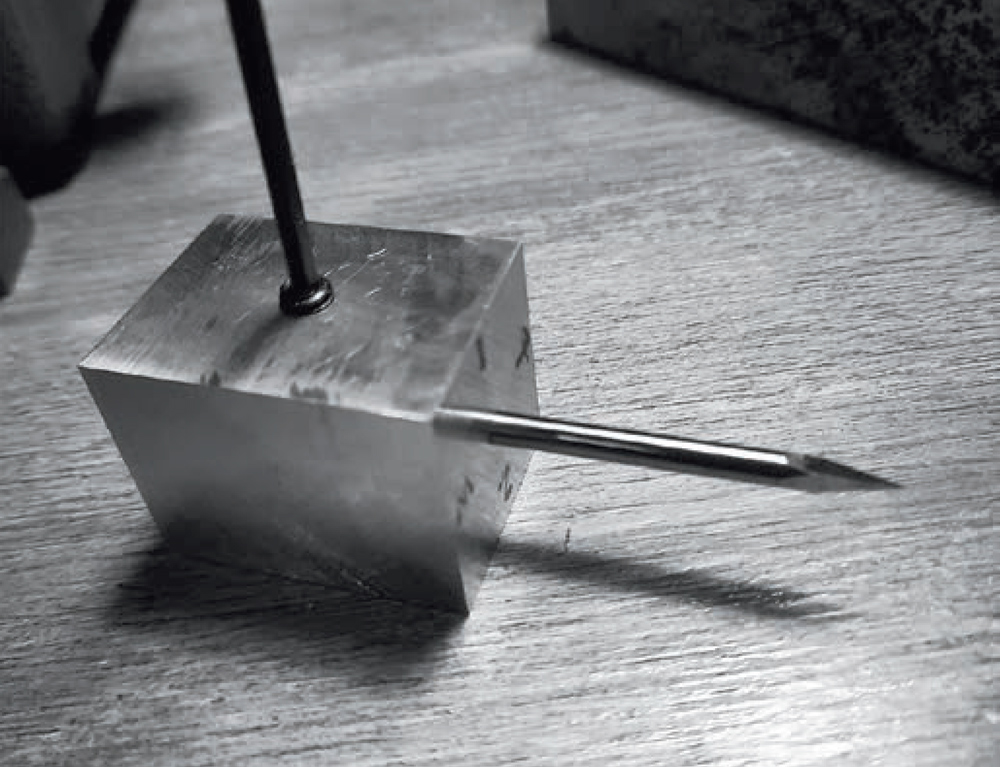
The pantograph engraver’s cutting tool locked into a brass block for honing.
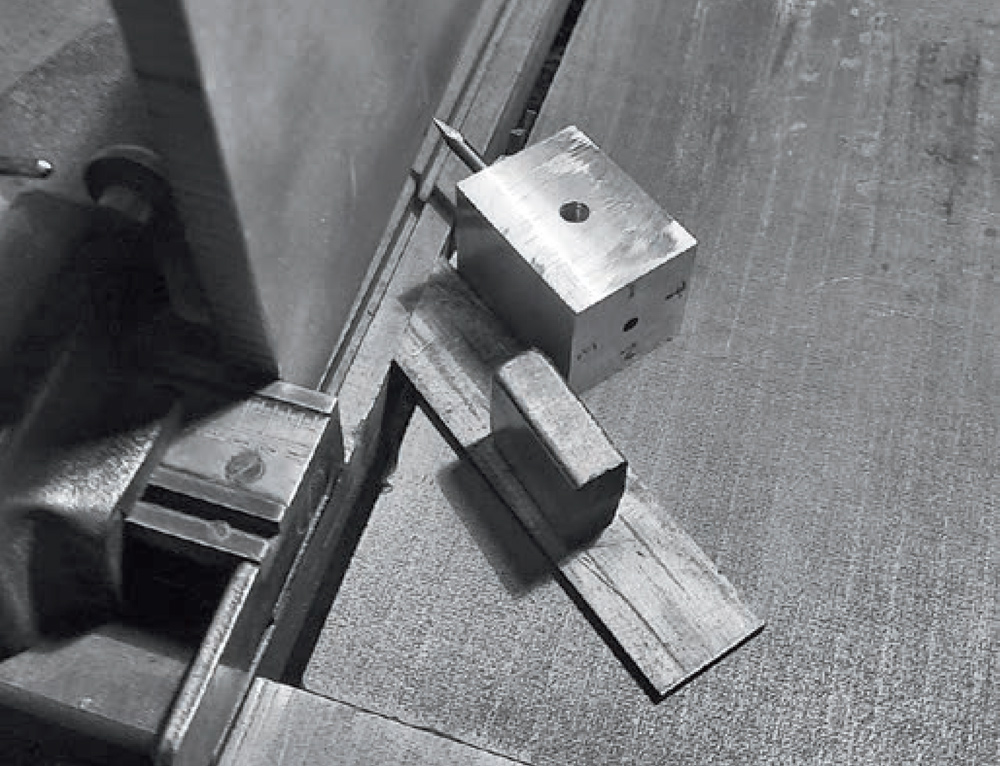
The cutting tool and block positioned against a diamond stone on the glider saw.
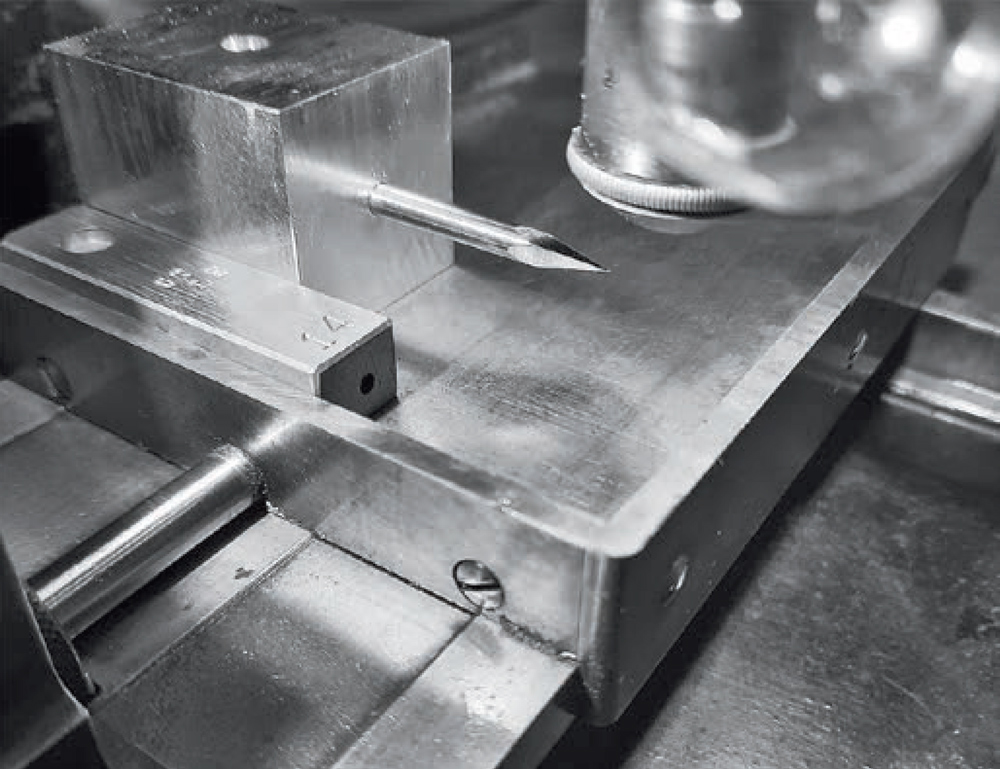
The cutting tool and block positioned under the ATF microscope to measure the exact width of the tip.
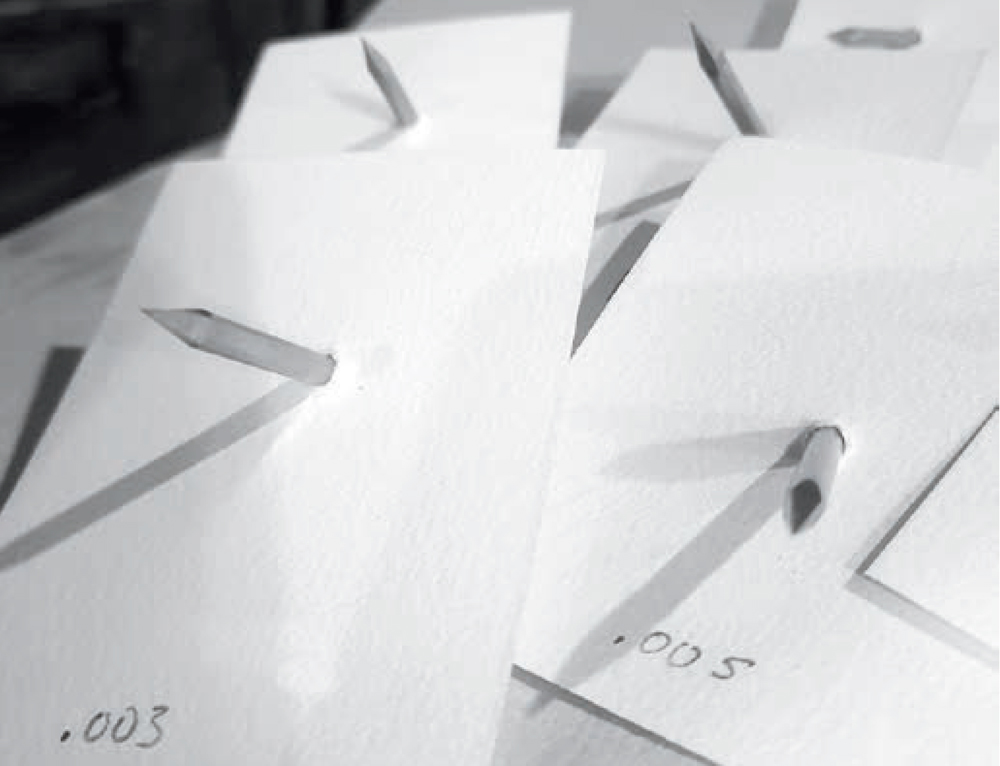
A variety of honed and ready cutting tools.
Now, the trick is, these tiny cutting tools often break, so one needs to have a handful of them finished and ready to swap in. This means that multiple tools need to be honed to have exactly the same tip, and this is the process I had no way to replicate mechanically. Jim’s process, which was typically Jim, was to simply hold the cutting tool at a slight angle and slowly drag it along an Arkansas stone, and somehow he made that work. However, even the slightest bit of extra pressure, or dragging the tool even an extra half-inch on the stone, can easily turn a .002 in. tip into a .005 in. tool, which would mean regrinding the tool back to a zero-point and starting over. I needed a more reliable process.
What I came up with is a bit ridiculous, but it’s proven to be quite successful. I took a block of brass and bored a one-eighth-inch hole through the length of it, then drilled and tapped a hole down from the top to take a set screw. The cutting rod is inserted through the bore and held in place by the set screw. This allows the cutting rod to be rotated 90 degrees, simply by turning over the block one side at a time. The block is then set at a 45-degree angle on the table of a glider saw, with a diamond-plate sharpening stone secured on the moving side of the saw. The stone is then moved forward, honing the tip. With the glider saw I could carefully control how far the tip moved along the stone, and through trial and error I worked out how far to drag it to obtain the desired tip (which was carefully inspected under a microscope).
I’ve gone on and on about this process because the entire success of an engraved matrix depends on the quality of the final cutting tool, and it took me a very long time to find a process that would yield consistently reliable results. Once I’d figured out how to produce cutting tools to spec, the rest of the process was relatively simple, albeit technically grueling.
The next step is to produce the needed quantity of matrix blanks. I use .25-inch by 1.5-inch “half-hard” or “alpha” brass, first cut to pieces with a band saw, then finished on the ATF fitting machine (essentially an end mill which finishes each side of the blank to a smooth and true surface). These must be finished to exactly the same thickness so that, when placed into the pantograph, the cutting tool will meet the surface of the blank at exactly the same height each time. This, in itself, was more than forty hours of work just to prepare the matrix blanks to spec.
Next up was to produce the patterns. While Jim followed Goudy’s process to produce his patterns (hand-cutting the glyph in bristol board and then engraving lead master patterns), I skipped this step and used a laser cutter to produce one-eighth-inch-thick acrylic patterns. While this eliminates the hand from the final shape of the glyph, it’s a concession I made for efficiency and the quality of the result. The cut pattern was then adhered to another sheet of acrylic, providing a smooth surface behind the pattern for the pantograph follower to travel on.
These patterns are then set, one at a time, onto the follower table of the pantograph, and the cutting ratio is set on the machine’s cutting arm.
Next up was the engraving itself. I was cutting a 60-pt type on a 48-pt body, and the matrix spec on the Super Caster for 48-pt type is a depth-of-cut at .065 in. (standard depth for type up to 36-pt is .050 in.). Attempting to cut that deep into the brass would immediately result in a broken cutting tool, so the engraving must be done in stages. My process, largely based on Ed Rayher’s specs, (2) involved five separate cuts:
- To a depth of .020 in. using a .100 in. follower and a .015 in. tip.
- To .040 in. using a .100 in. follower and a .015 in. tip.
- To .056 in. using a .075 in. follower and a .010 in. tip.
- To .064 in. using a .032 in. follower and a .005 in. tip.
- To .067 in. using a .020 in. follower and a .003 in. tip.
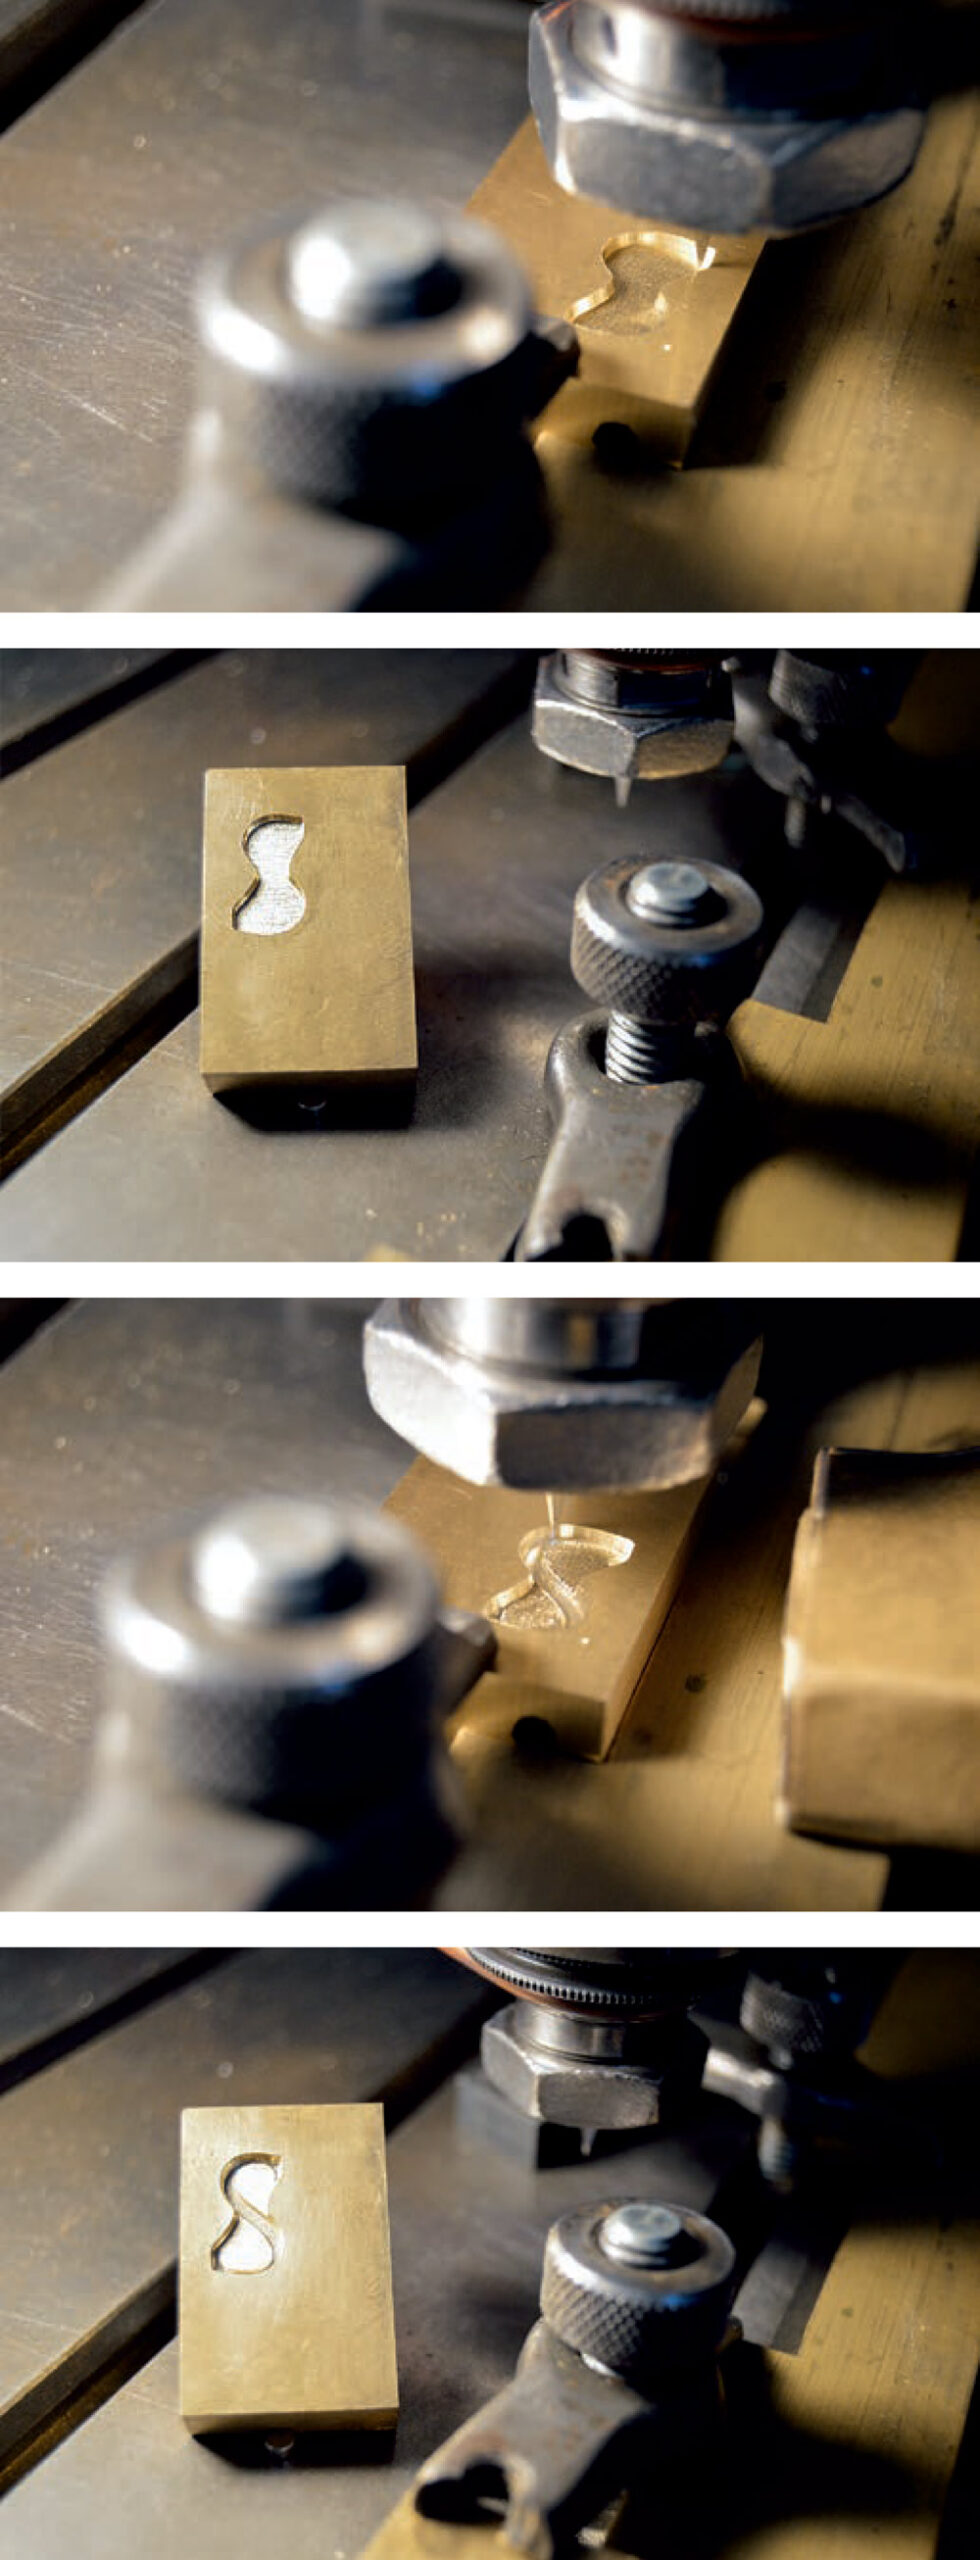
Matrix locked into the pantograph, engraving the second of five cuts (top), after second cut (second), locked back in for the final cut (third), and after final cut (bottom).
The final cut is a full-blown, horrendous pain in the ass. Imagine printing off a 390-pt letter in outline and using the finest-point pencil you can buy to fill in that outline—and keep in mind that it’s absolutely vital that you fill in every microscopic spec of that area. Now imagine you’re doing this with a white pencil-crayon on white paper. The point is, you can’t see what you’re engraving (the engraved area on the brass matrix is both too small and also filled with cutting oil). This means you’re moving a tiny follower around in a fairly large pattern, but you have no way of knowing if you’ve completely covered the entire surface. Even the tiniest area missed will result in a raised “whisker” on the floor of the mat, and, in turn, a pockmark on the face of the cast type. In the end, the final cut for each 60/48-pt character took over an hour (times twenty-seven characters for this titling face), and that’s just the final cut, let alone the four cuts prior to that for each matrix.
Two steps remain. First, the matrix has to be finished to the exact depth for casting. As above, the final engraving cut was done to a depth of .067 in., which is .002 in. deeper than spec. This is to account for both mechanical and human error, to be sure the mat is cut deep enough. From here, the matrix is measured with an ATF depth gauge, which is an extremely sensitive piece of equipment. If the depth proves to be a tiny bit too much, the mat is rubbed on 2000-grit sandpaper, then measured again, and again, and again, until the cut is exactly .065 in. deep.
Finally, the matrix needs to be fitted, which is to say it must be trimmed so that the image is located precisely, relative to the top and left sides of the mat, thereby ensuring consistent baseline alignment and lateral fitting when cast. The ATF fitting machine has a microscope mounted on it, and the moving table has a stop for positioning the workpiece that can be adjusted in one-sixteenth-point increments. Each pattern is made with a tiny dot in the top-left corner, always in the exact same position, which is also engraved onto the mat to a minimal depth. This dot is used on the fitting machine, through the microscope, to position the mat and trim the head-and left-side-bearing to exact specs.
And then, of course, the type has to be cast, which is a whole other process, but let’s just say from this point on things went smoothly. (That’s not actually true, but let’s go with that.) There is now, in my shop, a nice full case of 48-pt Orfei, which will be used as the titling type for the next Greenboathouse Press book, a poem and essay by Crispin Elsted, which should be on the press this summer (2024).
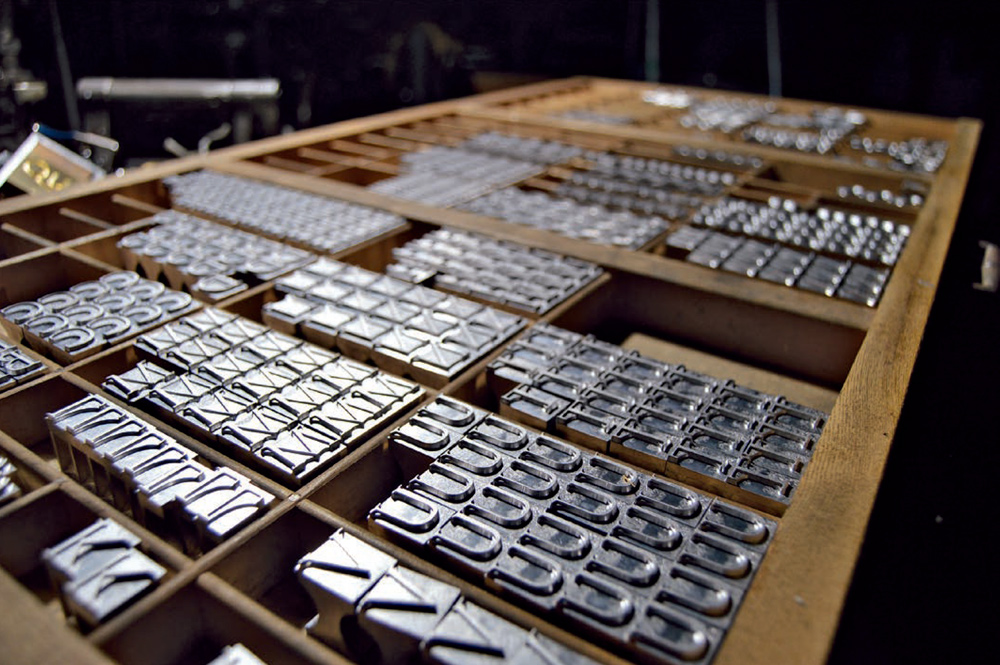
A case filled with freshly cast type.
Now, back to that horseshoe. Last year I put together a virtual presentation for the 2023 ATF conference discussing much of what’s in this article (it was, in fact, a short film with a Q&A after). On preparing and then presenting that film, I was reminded how bloody lucky I’ve been to meet and engage with those who walked this path before me. While I pride myself on being reasonably mechanically inclined, the technical processes required to engrave a usable set of matrices was so far beyond my skill set that I would have been screwed if it weren’t for those I’d come to know in the ATF community, as well as those whose homes I’d shown up to essentially unannounced.
A few days before sitting down to write this (mid-January 2024) the news came in that Theo Rehak had died. Seemingly the week before it was Jeff Shay (March 2023), and before that Greg Walters (Jan 2022), and David Johnston (2015), and, of course, Jim Rimmer in 2010 (and too many others). While Theo was certainly the master technician, and Jim the maverick genius, all five were major players in the typecasting community, which is, sadly, losing many of its key members. These losses are both tragic and inevitable, and they serve as poignant reminders that it’s vital to keep alive and in practice the knowledge, skills, and traditions that Theo, Jim, Greg, Jeff, David, and others spent much of their lives practicing.
While there are still a good handful out there cutting away at this stuff the same way that I am (like Ed Rayher in MA, Val Lucas in MD, and Patrick Goosens in Belgium, to name just a few), new matrices for casting fresh type have become a very rare thing these days.
I make no claim that the Orfei mats I’ve cut would stand up to Theo’s or Micah’s scrutiny. I have a lot still to learn and refine. But, despite it taking more than a decade, I think I can say that I’ve kept up my part of the bargain. Jim spent most of his life literally grinding away in his basement in New Westminster, largely unnoticed, drawing and cutting and casting new types, just as Jenson and Caxton and Baskerville and Goudy had before him, and by many of the same methods. Jim’s legacy alone is a daunting one to approach, let alone those behind him, but with Orfei I’ve managed to keep all of Jim’s gear in action, and will continue to do so until it’s time to pass it on once again.
NOTES
1 See also Jim’s memoir, Leaves from the Pie Tree: Memories from the Composing Room Floor, 2006, Pie Tree Press, or the trade edition published by Gaspereau Press in 2008.
2 See Ed’s pamphlet Swamp Press turns virtual Xenotype Cherokee into Hot Lead Monotype, 2014, Swamp Press.
